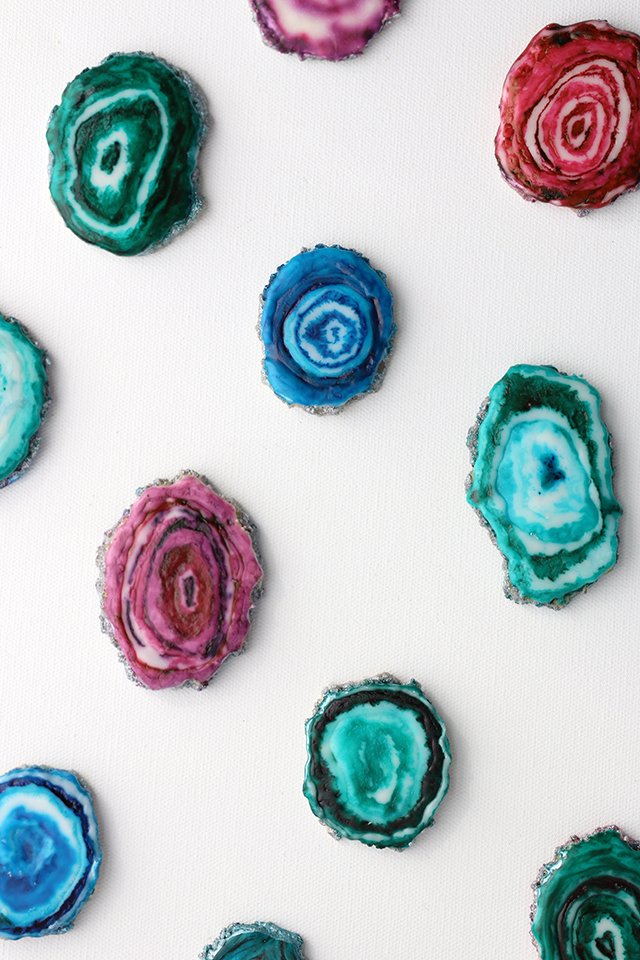
DIY: Agate Cookies
Agate Cookies
Agate Cookies Blue
Stone Cut Cookies
I wanted to take the agate slice cupcake from my Gemstone Cupcake DIY one step further, so I decided to make a batch of agate sugar cookies. Best of all, I simplified the process I used in the cupcake DIY to make it even easier to do. Follow along below for the DIY!Materials Needed:
Sugar cookie dough
Royal icing (in a piping bag) [for recipe, see HERE]
Food coloring (either water or gel-based)
Paintbrush
Piece of scratch paper
Optional: Metallic silver edible color, sanding sugar
Agate Cookies Materials
Agate Cookie DIY
Directions: Step #1: First, roll your sugar cookie dough into small oval rounds and place on an ungreased cookie sheet. Bake your sugar cookies at 350 degrees until the edges are ever so slightly golden brown (about 10 minutes). Once baked, set aside to cool.Step #2: Once your cookies have cooled (and while they are still soft) gently tear off the edges to create a rough edge around the cookie. If your cookies are a bit uneven (as mine were), use the backside of the cookie as your canvas for Step #4.Step #3: Prep your gel colors by mixing a small drop of each color with water. You can play around and add more dye or more water to get different shades of each color. I used an egg carton to hold my colors, but if you don't have one handy, just use individual bowls.Step #4: Prep your workspace setting out the mixed colors, icing bag, and a piece of scratch paper (which you can use to blot color off your brush). To begin, cut a small tip off of your icing bag. Starting in the center of your cookie, add frosting while working in a circular motion; work until you're halfway to the edge.Step #5: Dip your paintbrush into one of your colors and paint the center of the cookie, as well as 1 (or more) outer rings. I prefer to follow the circular pattern of most agates, but feel free to mix it up...just have fun with it! You can water down your brush to get lighter shades of the color in the different rings. Allow the cookie to set for a few minutes. (Note: Working in two parts, prevents any over-mixing and helps avoid the colors from running)
Remember: Make sure to blot your brush to avoid watering down the icing.
Blotting Paper
Agate Slices
Step #6: Add the remaining icing around your cookie until you reach the edge. Again, paint using different tones of the color, while following the same circular motion. Set aside to dry. Once the cookies have set for 30 minutes gently paint around the edge using a silver metallic color to achieve the outer appearance of a rock. You can also add sanding sugar to provide a bit more dimension to the cookie. Once you've painted the edge, set aside to dry for 24 hours.Wait a minute...24 hours?! Yeah, annoying, I know. But if you're just wanting to eat them or serve them straight off the plate you certainly don't need to wait that long. However, if you'll be transporting these or want to make sure the icing doesn't crack, you will need to wait the full 24 hours. Some recommend leaving cookies frosted with royal icing out in the air for the 24 hours, but I always just put mine in a container with a layer of plastic wrap over the top while they harden. And don't you worry, I promise they'll be worth the wait!


